Galley: 1) the kitchen of a boat. Sally: 1) a venture off the beaten path, 2) a military action in which besieged troops burst forth from their position, 3) a witty remark.

Wednesday, April 3, 2013

Nigellla's Chocolate Olive Oil Cake

Incredibly moist and delicious. My ancient camera doesn't do it any justice.
This recipe was created by Nigella to be gluten and dairy free, but not vegan. It does have eggs. If you can get farm fresh eggs, use them!

We made this cake as a family one Saturday afternoon, with my husband and daughter assisting with the various mixings. You'll see too a note about a great way for kids to help prep the cake pan.

The cake does have several steps, but the ingredient list is very simple, and the steps are easily executed too. Best of all, when done, you'll have a cake that is hard to leave alone. Nigella noted that the almond meal gives the cake more of a dinner-party pudding feel, with a "squidgy interior." If you are one who likes moist desserts, fudgy brownies, and good chocolate, you'll love this cake. We did. It only lasted two days in our home.

You will need...

2/3 cup regular olive oil (I used extra virgin), plus more for greasing
6 Tbsp good-quality unsweetened dark cocoa powder, sifted (sifting is always better, but I don't have a sifter and things went just fine. Just use a fork to smoosh all the little cocoa lumps before adding it.)
1/2 cup boiling water
2 tsp best vanilla extract
1 1/2 cups almond meal (flour), OR 3/4 cup plus 1 Tbsp all-purpose flour (if you are going gluten free, almond meal is your choice. If you are not going gluten free, almond meal is your choice... unless you are determined to have a lighter crumb cake.)
1/2 tsp baking soda
pinch salt
1 cup superfine sugar (you really do want superfine sugar. It is in the baking isle.)
3 eggs

1 x 9 inch spring from cake pan (I only had a 10 inch pan, and things were fine. Just keep an eye on the bake time, though I didn't notice much difference).

What to do...

1) Preheat oven to 325 F. Grease springform pan with a little olive oil and line the base of it with parchment paper. (If you are baking with a kid, have them trace the pan and cut out the circle for you, it is good fun for them, and will give you a minute to attend to the next step.)

2) Measure and sift (or smoosh with fork) the cocoa powder into a bowl and whisk in the boiling water until you have a chocolatey, smooth, still runny (but only just) paste. Don't over mix! Whisk in the vanilla extract and set aside to cool a bit.
3) In a second small bowl, combine the almond meal (or regular flour) with the baking soda and salt.

4) Mix together the sugar, olive oil, and eggs and beat together vigorously until you have a pale-primrose, aerated and thickened cream. (Nigella says to use a freestanding mixer with paddle attachment for this step, but I did fine with a wooden spoon.)

5) Pour in the cocoa mixture, beating as you go, and when all is scraped in slowly add the almond meal (or regular flour) mixture. If you are using an electric mixer, be sure to turn the speed down before adding the cocoa and flour mixtures.

6) Scrape down and stir a little with a spatula, then pour the batter into the prepared pan. Bake for 40-45 minutes or until the sides are set and the very center, on top, still looks slightly damp. A cake tester (you can use a thin knife) should come up mainly clean but with a few sticky crumbs clinging to it.

7) let it cool for 10 mins on a wire rack, still in its pan. Then, ease the sides of the cake with a small spatula and spring it out of the pan. Leave to cool completely if you can (!) or eat while still warm with ice cream. Yum!!

Friday, March 15, 2013

Mariette's Sausage Buns (are really rich!)

I love going through cookbooks. And you have no idea how weird it is that I just wrote that.

My dad gave me a cookbook that I really wanted for Christmas. I found it while I was Christmas shopping, and immediately lusted for it. It was the picture of the "chocolate nutmeg cupcakes & glossy coffee frosting" that really did me in, but the first thing in the book I made was Mariette's Sausage Buns. The picture looked so incredibly, wholesomely rustic that they just begged to be made. So I did. I don't know if rustic usually equals incredibly buttery and rich, but these buns are both.

The recipe credit goes to Yvette Van Boven (and her mom), but the discovery that if you are going to go skiing, you should probably pack sausage buns for lunch is mine. These are not low-cal folks. There is enough meaty, buttery goodness to keep these buns from freezing solid on a cold day, and enough caloric power to blast you down the slopes of your choice.

Van Boven states that this is one of the oldest recipes she has. You should make them, don't you think?

(One last note. There is a bunch of writing coming up. Mostly things I learned making these buns. Don't be discouraged and think all the writing means they are hard to make. They are decidedly not hard.)

Be sure to see my note about crimping the ends of these yummies!
You will need...

For the Filling
2.25 lbs ground sirloin
1 egg
3 Tbsp ketchup
1/3 cup ketjap manis (This is an Indonesian sweet soy sauce. I couldn't find it here, so I added a little sugar to my Braggs amino/soy sauce and called it good.)
1 Tbsp Worcestershire sauce
1 Tbsp cinnamon
1 Tbsp allspice
1 Tbsp grated nutmeg (ideally fresh, but mine wasn't)
2 Tbsp prepared mustard (I used a dijon)
handful of diced bread crumbs
dash of Tabasco sauce
1 tsp salt

To Wrap and Bake
oil or butter for greasing
1 egg, beaten
15 sheets of puff pastry, thawed... TAKE NOTE: This is an Irish recipe. Before this, I had never, ever bought frozen puff pastry before. At the store, the boxes each contained TWO sheets of pastry. I couldn't believe I was expected to buy 7+ boxes of pastry. It seemed inconceivable. And really expensive. And I wasn't going to do it. This resulted in a bit of grocery paralysis, as I already had all the other ingredients required in my basket. Finally, the price decided it for me. I would buy two boxes, four sheets total, and see what happened. What happened is I discovered that ONE U.S. pastry sheet apparently equals FOUR Irish pastry sheets. So don't buy 7+ boxes. Either make your own (which is easy as it turns out), or buy two boxes and cut each sheet into quarters.

What to do...

1) First, make the filling: Combine all filling ingredients in a big bowl and mix thoroughly. You may want to use your hands to get a good mix. For the bread crumbs, add only as much as necessary to make the filling smooth and consistent, but not too moist and definitely not sticky.

2) Preheat your oven to 350 F. Line two baking sheets with parchment paper. (The original recipe states that you can alternatively grease the baking sheets. This would keep the buns from sticking, but I recommend using the parchment paper, as it will absorb a bit of the excess grease from the buns. A greased baking sheet will not...)

3) For each pastry sheet, make a "sausage" of the ground meat mixture. Fold the pastry around the mixture and press the edge firmly with your fingertips, then crimp with fork. Continue until all meat and pastry sheets are used. IMPORTANT NOTE: In Van Boven's recipe picture, the ends of the buns are not crimped. If you look at mine, you will see the ends are crimped. I crimped because there was enough pastry to do so, but I highly suggest not crimping the ends unless you are taking the buns on your ski trip. My feeling is that the end crimping held in excess grease from the meat. Without the end crimp, the grease could have drained out and been absorbed by the parchment paper. They still taste great crimped... but again, higher cal.

4) Arrange the rolls on the lined baking sheets and brush them with the egg. Bake 25 - 30 mins, until golden brown.

Yvette Van Boven suggests eating the buns with an apple & tomato chutney. I haven't made this yet, and the buns were great without it!

Wednesday, January 16, 2013

I'll come back...

Hello out there. Anyone? Anyone?

My poor lil' blog. I abandoned it. I did. And I don't even have a very good excuse. Heck, I don't even have a bad excuse.

But I do have a new cookbook that my Dad gave me for Christmas, and it is gorgeous, and perfect, and exactly the one I asked for.

Soooo... I made some stuff. And I took some pictures. And it tasted good.

I'm gearing up to post something real here.

Something real, real soon.

Monday, October 15, 2012

Genetically Modified Food, what are GMOs?

They are nothing good. Beyond that, they are frightening, and deadly.

Please watch and share this video. What you learn will change your life, and then you can help others learn and change too.

 https://www.youtube.com/watch?feature=player_embedded&v=Ao_Hs2nNQDA

Thursday, September 27, 2012

Vegetarian Corn and Sweet Potato Chowder

Every week we get a lovely, fresh, frothy half-gallon of farm fresh milk from a local farm. And then, the race is on. We don't have a refrigerator, so I buy a fresh bag of ice every day until the milk is gone. But even so, sometimes it isn't "getting gone" quite fast enough. I don't want to waste something so precious. No spoiled milk down the drain here. So, when I realized our milk was on its last legs--with a fair amount left--I went looking for a chowder recipe.

It had to be simple. It had to be child-friendly. And it had to have LOTS of milk. I found it, by blending two different recipes together.

Vegetarian Corn & Sweet Potato Chowder

   
Serves 4
You will need...

1 1/2 Tbsp unsalted butter
1 medium yellow onion, chopped
1 large carrot, chopped
1/2 celery stalk, chopped (optional, I didn't have so didn't use)
16 oz. sweet corn (can be fresh, frozen or canned. just don't buy "cheap corn" as it is tough.)
1 large bay leaf or 2 small
4 cups milk, whole or low fat
1 large sweet potato, peeled and diced
1 red bell pepper, chopped (I only had a green pepper, so used that instead)
Kosher salt and fresh ground pepper
1/2 teaspoon fresh thyme leaves (or substitute 1 tsp dried thyme)

What to do...

1) In a large saucepan, melt the butter over medium heat. Add the onion and sauté for 4 to 5 minutes, until soft. Add the carrot and celery and cook for 4 or 5 more minutes.


2) Add the milk and bay leaf. Bring to a boil and reduce heat to a bare simmer. Cover the pot and cook for 30 minutes. Make sure the heat is as low as can be and still maintain a gentle simmer. Be sure heat is low enough to prevent scalding the milk on the bottom of the pan.


3) Discard the bay leaf. Raise the heat, add the potatoes, red/green pepper, 1 teaspoon of salt, fresh ground pepper to taste, bring to a simmer and reduce the heat to maintain a simmer for 15 minutes, or until the potatoes are almost fork tender.

4) Raise the heat, add the corn kernels and the thyme. Bring to a boil, reduce the heat, and simmer for 5 minutes.


Thursday, September 20, 2012

How Do You Cook on a Boat?

Wellllllll......

I have a three burner propane range.

And I have a diesel heater with a cook top that I put our Dutch oven on.

AND...

AND!

We just ordered a new oven! I am finally going to have an oven! But don't despair! If you are one of those proud boat folks with no oven, you will still find plenty of recipes here for you.

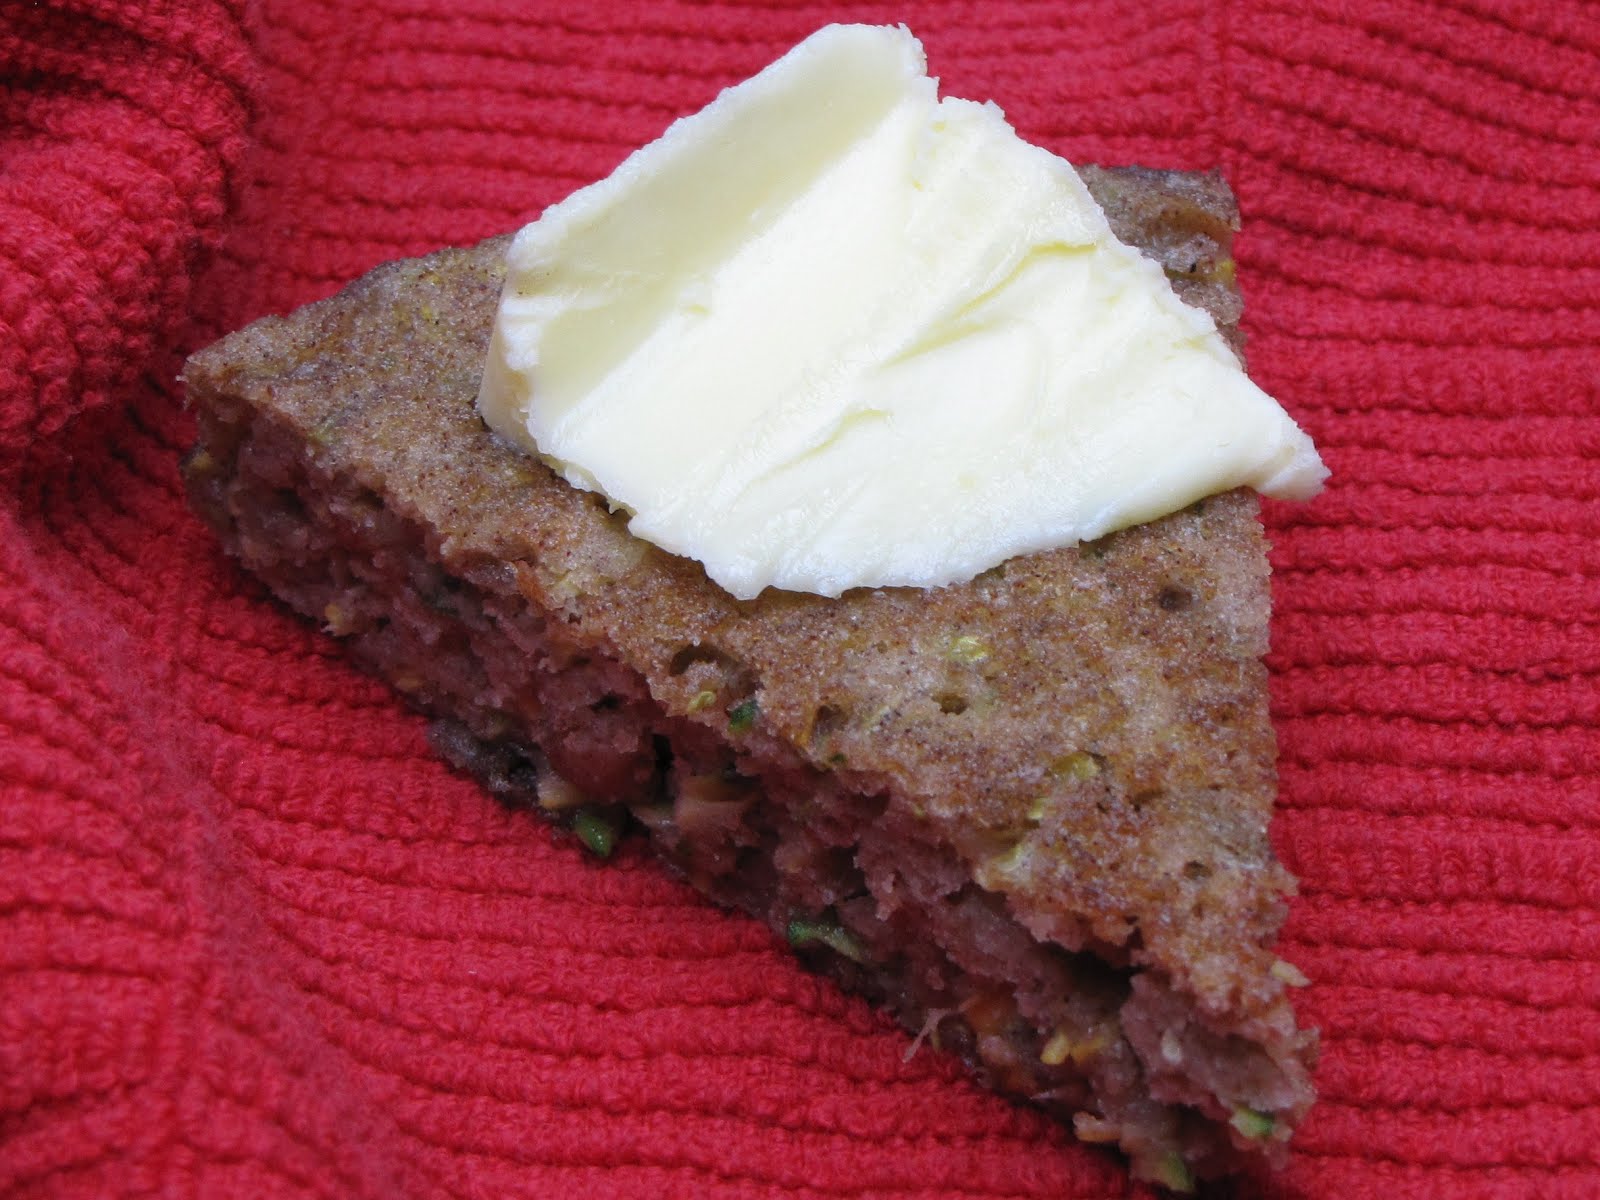
Example: Today I made delicious and simple zucchini bread in my Dutch Oven. And seriously, if your diesel heater with cook top is blazing merrily along, keeping your boat toasty and cozy, why on earth would you bother pre-heating an oven and going to all that trouble? And waste your propane? You wouldn't. You would pull out your trusty Dutch Oven and make scrumptious zucchini bread.

Here goes:

Super Simple and Healthy Zucchini Bread

Okay, so I took a bit of the butter off after taking the picture...

You will need...

1.5 cups flour (whole wheat or white)
3/4 cup sugar
1/4 tsp baking soda
1/2 tsp baking powder
1/4 tsp salt
1.5 tsp cinnamon (I used almost 2 tsp.)
2 eggs
2 1/4 cups grated zucchini
1/4 cup applesauce (or veggie oil)
1.5 tsp vanilla (I used almost 2 tsp.)
1/4 cup chopped walnuts (optional)

What to do...

1) Place Dutch Oven on heater or over burner to begin preheating. If using burner, use a medium flame.

2) Mix all the dry ingredients thoroughly.

3) Mix all the wet ingredients thoroughly.

4) Combine and stir until just well-mixed. Don't over-stir. Pour into a well greased baking pan that fits in your Dutch Oven. Place baking pan on elevated surface in Dutch Oven. If you have not used a Dutch Oven for baking bread before, follow this link and check out Step SIX.

5) Cover, and bake until delicious smells fill the air. Check, and let steam out. Re-cover, and bake until knife comes out mostly clean (just a few moist crumbs sticking is good).

4) Remove from pan, and allow to cool, but not too much! Warm with butter is the best.

I decided to try just one slice. Nearly a quarter of the pie slice.

Friday, August 17, 2012

Summer Sailing... Lots of work and fun!

Hello Everyone!

I miss my blog! But I have come to the rather late conclusion that I have to put it on hold for the summer.

I WILL BE BACK IN THE FALL!

We are so busy sailing with all the wonderful people who have discovered our business this year, that I honestly cannot find time for photographing food and posting recipes. I also haven't been experimenting much. We have a gorgeous farmshare, so we're eating tons of fresh veggies, local meat and local milk. This makes me very happy.

We've also discovered some organic and delicious local granola and muesli. YUM!

So, I'd love to "see" you here in the fall. And until then, happy sailing to you too!

Cheers!

Thursday, June 28, 2012

Tuesday, June 26, 2012

Darn Resolution

We're at the six month mark for 2012, and I'm not doing so great with my New Year's resolution to be better about my blog. Obviously. When was my last post? A month ago? Two months? I don't even know. That rhubarb custard was good, but not good enough to be a placeholder for this long.

The frustrating thing is that I actually am inspired to keep this blog up and running. I want it. But the time! Cripes the time. Where does it go? I write "Blog" on my list every day, and every day it gets bumped to the bottom, and then off, and then onto the next day's list. Throughout each day, I'll imagine how I'm going to start my next post. I'll think of a clever opening, or something I want to write about, and then... suddenly... it is five days later, no words written, and no idea of just what those (supposedly) great ideas were.

I was going to write something about meeting my ex's mom for the first time, and the list of questions I abysmally failed to answer appropriately. I was 19. He was 28. I thought everything was fine. I think I did eventually grow on his mom. Somehow, that was linked to cooking. To blogging. To a clever entry that you may very well never read.

I was going to write about making pesto for the first time, and my father's questionable compliment of it. I don't think he cared for my rendition. But he ate it. What else could he do? Trapped, at anchor, as he was?

I was going to write about how my kid loves broccoli and zuchinni and beans and tomatoes and sweet potatoes and onions in a balsamic vinegar reduction sauce, but then I thought that might sound like I was bragging.

And now, what do I write, what do I share, what do I post to get started again?

It should be something catchy. Something yummy. Something that thousands of people are searching for online at this very moment. Or maybe not at this moment. Maybe in a few days, when everything else is crossed off my list.

Fear not! The Gally Slave Sally is not dead. She even took pictures of that pesto. I'll post them, and you can comment for yourself.


Tuesday, May 22, 2012

Rhubarb Custard Tart


So... do I list all of my excuses reasons for not posting in so long? Or do I just get back to business?

Business sounds too stuffy, let's get back to baking instead! Last Wednesday I picked up our first CSA (Community Supported Agriculture) basket from the Coffelt Farm. First, let me say that the box of farm goods was so lovely, so gorgeous, and so packed with love. A cedar tree fell on the farm during the winter, and the decision was made to use the tree to construct sturdy, beautiful boxes with handles for the CSA program. I didn't have a camera with me when I picked up our box, but I sure wish I had... Radishes, Fava-tops, Spinach, Kale, Scallions, Chives, Eggs, Rhubarb, Lilacs and even honey filled our box to the brim. Add half a gallon of creamy fresh milk, and I enter a state of wide-eyed "how did we get so lucky??"

Of course, it isn't just luck. The farmers worked hard and planned long in order to bring such a glorious Spring harvest to our table. But we feel lucky to live in a place where we can make the decision to support a local farm, and bless ourselves with delicious, organic, local food from farmers we know. This is the moment I wish I could post a picture of our box... I'll have to take one this week instead.

But wait! There was one last item tucked into our box: a recipe for Rhubarb Custard Tart. Not having an oven, I wasn't sure how it would go, so I ran two different experiments, and am happy to report that both were completely (and happily) consumed. First I made the Custard Tart first without a crust (simpler and easier for a small space), and then with a modified crust. Both worked great. Of course, you can use a standard tart crust recipe too if you'd like, but I'm not addressing that in detail here.

(A brief funny story... When I served this the first time--in a rather dim evening light--before taking his first bite my husband expressed concern that I had made him a rhubarb omelet for dessert. This was the no crust version....)

Rhubarb Custard Tart
Recipe from Katy at Coffelt Farm

You will need...
9" cake or tart pan. Use glass or Pyrex if you can. I discovered the rhubarb is acidic enough to remove some coating from my metal pan... so I think we ate some of the pan too.

1 sweet tart crust, unbaked (or skip the crust, or make a simple, modified crust)
Modified crust: 1/3 cup whole wheat flour, 1/3 cup rolled oats, 4 Tbsp butter
1 1/4 lbs rhubarb, washed and sliced into 1/4 to 1/2 inch pieces
1/2 cup + 2 Tbsp sugar, separated
2 Tbsp flour
1 pinch salt
1 cup half and half (I used whole milk)
3 eggs
1/2 tsp vanilla
butter to coat pan

Note: I baked this using a Dutch Oven over our Dickinson heater. You could also place a Dutch Oven on your range. Get your Dutch Oven preheating, just like a standard oven, while you prepare the tart. Start with medium-high heat, and adjust if necessary. If using a standard oven, preheat to 375 degrees.

1) In a large bowl, toss the rhubarb with 2 Tbsp of the sugar until evenly coated. Transfer the sugary rhubarb to a colander over the bowl, and let sit at least 2 hours to allow liquid to drain. Overnight is fine too.

This is only part of the rhubarb... not the full amount used.
Crust Options:
a) For sweet tart crust, roll out crust and fit into 9" tart/cake pan. Prick a few times with fork, and chill while oven is preheating.
b) If not using any crust, simply butter bottom and sides of 9" tart or cake pan.
c) For modified crust, first  butter bottom and sides of 9" tart or cake pan, then blend whole wheat flour and oats well in a small bowl. Cut in butter using pastry cutter or fingers. Once butter is completely blended in, press the crust mixture firmly into the bottom of the pan, making an even layer. Chill if possible. Don't worry if it's not.

Here is a secret. This "crust" is actually the recipe for an Apple Crisp topping. Shhhhh...
2) Whisk together the remaining 1/2 cup sugar with the flour and salt. Add a bit of half and half, whisking until it's a well-combined sludge. Add the remaining half and half, eggs and vanilla, whisking until eggs are completely blended.

Notice both hands are in the pic, meaning my own private food photographer took this picture.
3) If using a crust: remove crust from refrigerator if you are chilling it. Press on the rhubarb to expel any last bits of liquid, and scatter evenly over the crust. Give the custard another whisk to re-mix, and pour gently over the rhubarb. Place in the oven.


My tart ready to go in the Dutch Oven. See note below about elevating your tart.
4) If no crust: simply scatter the rhubarb evenly in the buttered pan, and gently pour the custard over it. Place in oven.

Note: You will need to secure an elevated surface in your Dutch Oven to prevent burning. I like to use an enameled metal plate.


5) Bake until custard no longer jiggles in the center and is just beginning to brown, about 30-45 minutes. The filling will puff dramatically, but will settle again as it cools. Remove from the oven and let cool a bit before serving.

We tried this tart both warm and chilled (on ice in our cooler). It was delicious both ways!! Also, there is a lot of info and possible steps here, but after you make it once, you'll see what an easy recipe it is!


Tuesday, April 3, 2012

Yogurt Cheese! A very easy cheese to make...

I just read an article about discipline... and immediately felt guilty about not being very disciplined in regards to my blog. Try harder? Or just post an incredible easy recipe for making yogurt cheese?

Yogurt Cheese! (on toast)

It will take me longer to type up this post than it will for you to (actively) make the cheese. Really. And the cheese is soooo yummy! I have been making yogurt from local milk, but we cannot eat the yogurt fast enough. I get a new half gallon of milk every Wednesday, and we're just not keeping up. Enter the yogurt cheese. Suddenly, a few pieces of toast takes care of the problem!

You will need:

4 cups yogurt
1 tsp salt
cheesecloth
colander
bowl
refrigerator or chill-ish environment 

What to do:

1) Place colander over a bowl and line with cheesecloth (2 layers. I like to use the If You Care brand).


2) Place all 4 cups of yogurt into cheesecloth.


3) Tie cheesecloth and suspend to drain over bowl or sink for 30 minutes.


4) After 30 mins, return to colander (over bowl) and refrigerate overnight. Or place in chill environment overnight. I put mine outside, covered (no fridge here).


5) In the morning, remove cheese from cheesecloth and place in bowl. Thoroughly stir in salt. Voila! You have yogurt cheese. The consistency is similar to cream cheese, a bit softer. Store in airtight container in cold environment. Try adding jelly, fruit, chocolate syrup? I'll bet Nutella would be good! Mmmmmm!


Tuesday, March 27, 2012

Mushroom and Black Bean Tortilla Casserole


A little over five years ago I had a dishwasher. And not just any dishwasher. I know that there is some disagreement over husbands giving wives appliances as gifts, but that dishwasher was a beauty. My husband found it at the local REstore (Reduce, Reuse, Recycle), and immediately bought it for Christmas. At the time we were remodeling our house, had little money, and this dishwasher was more than a deal. It was a Fisher & Paykel stainless steel, two drawer glory. I can't help it. Here she is:
Fisher & Paykel : DD24DCX6 Semi-Integrated Double DishDrawer - Stainless Steel with LCD Display

Now you know what I'm talking about.

We got it cheap, replaced a part, and were off and running. Yes! Running the dishwasher. Our evenings were completely changed. Suddenly, "buzzing up" the kitchen after dinner meant we really could whip things into shape in ten minutes. And it was quiet. And it washed the dishes. Sadly, shortly after we moved onto our last boat and rented out our house, the Fisher & Paykel gave up the ghost. An exact diagnosis was never reached, but I suspect it missed me too much to go on. Sometimes, the feeling is mutual.

But instead of carting myself off to the appliance recycling center, I continue the hunt for meals that use a minimum of dishes, and hence require a minimum of washing up. Because now, I wash the dishes, and I don't want very many. This recipe tastes good, and is conservative in dish use. Win!

Mushroom and Black Bean Tortilla Casserole

You will need...

2 tsp extra-virgin olive oil
3/4 lb. cremini or button mushrooms, trimmed and quartered (I just used standard white/brown mushrooms)
1 garlic clove, minced
1/4 tsp cayenne pepper
coarse salt and ground pepper
reserved cooked black beans, or 1 can (15.5 oz) black beans, rinsed and drained (Why I don't use canned beans)
8 corn tortillas, warmed and halved (I warmed mine in a cast iron skillet, no oil, one at a time)
2 cups salsa
1 1/4 cups shredded Monterey Jack cheese (I think I used at least two cups...)

What to do...

1) If you have an oven, preheat to 400 degrees. If you don't have an oven, you will use your Dutch Oven, so move on to step two.

2) In a large skillet, heat oil over medium-high. Add mushrooms and cook, stirring often, until browned ~7 mins. Add garlic and cayenne; season with salt and pepper.

3) Add black beans and stir to combine. Cook until beans are warmed through, 2 mins. Remove from heat.

4) If using Oven, arrange 5 tortilla halves in a 2 quart baking dish. No oven, arrange 5 tortilla halves in a lightly oiled Dutch Oven. Top with half the bean mixture and 1/2 cup salsa, then sprinkle with 1/3 the cheese. Repeat with another layer of tortilla halves, bean mixture, salsa and cheese. Top with remaining tortilla halves, salsa, and cheese.

5) If using Oven, cover with foil and bake until center is hot and cheese melts, ~10 mins. Uncover and bake until cheese is bubbling, ~5 mins. If using Dutch Oven, cover with lid and heat over very-low heat until center is hot and cheese melts.


6) Yum!

Wednesday, March 14, 2012

Spicy Black Bean Soup

MMMmmmmmmmmmm
When I have several dinners planned out in advance, I feel powerful. Kind of silly... but it feels a bit like being able to tell the future. I know what is coming, and I don't have to worry about it. Who ever worried about spicy black bean soup? or mushroom and black bean tortilla casserole? It's like knowing really good friends are coming for the weekend: You know you'll enjoy yourself, but without any stressful preparation.

So, yesterday I sat down with several cookbooks and flipped around. I was on the lookout for recipes that struck me as simple, healthy, and inexpensive. I made a shopping list of the ingredients, and now (after an incredibly mellow shopping trip with my four year old... she was actually really helpful...) I bring to you the deliciously simple spicy black bean soup! To be followed Friday with the casserole mentioned above! The future, revealed, no crystal ball required.

Spicy Black Bean Soup
from everyday food, Serves 4

You will need...

1 1b dried black beans, picked over, soaked overnight, and drained (see tip in step one for quick-soak method)
2 large yellow onions, diced small
2 jalapenos, minced (I used serrano chiles, and only one due to child)
1 Tbsp extra virgin olive oil
4 garlic cloves, minced
coarse salt and ground pepper
2 tsp ground cumin
1 3/4 cups veggie or chicken broth
1 Tbsp cornstarch
2 Tbsp fresh lime juice (read about my mistake here later in post)
Optional: diced avocado, diced onion, cilantro, plain yogurt and tortilla strips or corn chips for serving. (we used avocado, yogurt and corn chips)

What to do...

1) In a medium saucepan, cover beans with cold water by 2 inches. Add one-quarter each of onions and jalapenos and bring to a boil over high. Reduce to a rapid simmer; cook until beans are tender ~ 45 to 50 mins. (If you are going to make the aforementioned mushroom and black bean casserole, to be posted Friday, then use a slotted spoon to transfer 1 1/2 cups beans to container for refrigeration)

If you didn't soak overnight, don't despair: Instead of soaking dried beans overnight, cover them with cold water by 2 inches in a pot. Bring to a boil and cook 2 mins. Remove from heat, cover, and let sit 1 hour.


2) In large Dutch Oven or heavy bottomed pot, heat oil over medium-high. Add garlic and remaining onions; season with salt and pepper. Cook, stirring often, until onions are soft and golden brown ~ 10 mins. Stir in remaining jalapenos, cumin, beans and their cooking liquid and broth. Bring to a simmer and cook until beans are soft, ~ 20 mins. If necessary, add up to 1 cup water or broth to keep beans covered)


3) Transfer 2 cups soup to a blender and add cornstarch. Puree until smooth. Return to pot. Cook, stirring, until soup thickens, 1 -2 mins. Add lime juice and season to taste with salt and pepper.

Here is something funny. When I read the recipe (with many interruptions) I read "juice from two limes," instead of "2 Tbsp fresh lime juice." Yup. In my defense, the original recipe had, in parenthesis, "from 2 fresh limes." So, I bought two big limes and put ALL the juice in the soup. While I was squeezing away my husband (The Real Cook) commented on the quantity of the juice and I blithely replied, "It's the recipe!" And... It was very good. Very limey, but great! So... I don't know how just 2 Tbsp tastes, but if you like lime go ahead and add some more if you like! 

Proof of my error!

4) Top with avocado, diced onion, cilantro, yogurt and tortilla strips/chips if desired. (Can I say that I made the yogurt with fresh milk from the Coffelt Farm? Yum!)

Wednesday, March 7, 2012

Mama in the Galley

Sometimes I just want to write all about being a mommy, and not so much about cooking. When that happens, I take a glance at all the mommy mahme mama mother mamu mamilicious blogs out there and think, "Now really, there just isn't room for one more."

Writing another mommy blog feels like the old mitten story, where the boy loses his mitten in the winter forest, and one by one the animals come and make a home in the cozy space. First a mouse, followed by a mole, a frog, a rabbit, a fox... more and more animals, each bigger than the last, until finally the bear lumbers along, squeezes in, and the mitten bursts! The splitting wool flings all the animals back out into the chill of the wintry night, and in the morning the boy sees a mouse wearing a little red cap, the thumb from his mitten.

I am the lumbering bear. Too slow to claim a mommy spot for myself in the blogosphere. And while I certainly don't think I'm powerful enough to push everyone aside by squeezing in, I'm not certain there is even a remnant of wool left to discuss. From incredibly creative foods for kids (did you ever eat apples and cheese in the shape of the very hungry caterpillar?) to my favorite Scary Mommy, it seems no stone of motherhood is left unturned. There are so many brilliant mamas! Which is great. Which is good. Which is how it should be... but I'm suffering from an acute case of Fabulosis Mamiblog Envyitis.

How could I not? I mean, how great is this? Yesterday I read a blog post where the mommy suggests this T-shirt for new moms: 

I Make Milk. What's Your Superpower?

Now, I just took a brief tour through Etsy, and it turns out you can (and should) actually buy this T-shirt for new mommies. Whether the blogger had an original idea and these are her T-shirts... I don't know. Maybe another mommy stole the idea. Maybe a prowler mommy who stalks other mommies' delightful blogs and wishes they were hers stole the idea. Maybe that is all that is left for me: Slinking around on other mama-blogs looking for good ideas and laughing at the memory of the most on the money description of parenting I've seen yet. And while we're talking about it, the author of that inspired piece has the blog name Momastery.

She really does. Momastery. I'm not sure my education in biology has given me the tools to even come up with a competing blog name, 'cause yeah, Mommyology is taken too. You can see the mommyologist here.

I reported these feelings of Missed Opportunity, Incompetence, Lack of Foresight, and Frustration to a friend. She told me to go for it! Write another mommy blog! She even said, "The cream rises to the top." I love her. The only problem is, there is so much cream. Check this out: Top 50 Mom Blogs.

See how much mom-ing is going on already? For now I think I better stay here, a mama in the galley.

Tuesday, March 6, 2012

Simply Amazing Split-Pea Soup

I have to tell you all about this soup, even though I didn't take a picture. !!

I know... pictures are best, but I didn't know it was going to be so good, and then I was too busy "eating" to take a picture. When you are trying to spoon soup with one hand, hold a bowl with the other, flip fresh biscuits in the pan with your elbow, and calm a freaking out four year-old with deep breaths and lots of love... well, the camera suffers.

But this soup... nothing suffers with this soup. Not your budget, not your time, not taste, nothing! I don't have exact measurements because I just threw it together, but I think it would still be amazing by approximation.

Serves: Two adults and one child, with leftovers for two adult lunches! You will need...

1 fantastic, large pork chop, ~ 3/4 lb. I got mine from a small local farm. I found this very exciting.
1-2 carrots, sliced small
1-2 celery stalks, sliced small
1 large yellow onion, chopped
1/2 -3/4 cup barley
1 1b green split peas
water
salt and pepper to taste

What you do...

NOTE:  I didn't measure my water, but the package for the peas says about 8 cups per pound. I'm guessing I used somewhere between 11 and 13 cups of water total. Just start with closer to 8, and add water throughout as your soup thickens. This way, you'll get the consistency you want.

1) Place ~8 cups water and raw pork chop (mine was even frozen) in Dutch oven or heavy bottomed pot and heat over high flame. Add chopped onion and barley and bring to a boil.

2) Add carrots, celery and split peas. Return to boil, then reduce to steady simmer and cover.

3) Check regularly to stir and add water as necessary. My soup simmered for about an hour and fifteen minutes. Yours will be done when the peas reach the consistency you like. We like very soft here.

4) When the peas are done, remove the pork chop and place on cutting board. Remove all meat from bone, dice, and return meat to pot. If the soup is too runny, simmer with cover off until right. If soup is too thick, add water slowly.

5) When soup is ready, ladle into bowls and serve with salt and pepper. So Yum!!! I am eating the leftovers for lunch as I type, and am going to go heat up the last bowl now.


Thursday, March 1, 2012

Struggling to Write

I've been struggling with this blog of late.

I haven't posted anything recently.

I've also spent the last month with three different "bugs," most recently a nasty sore throat. I have to admit that when sick, I just don't feel like writing. I'm afraid that any readers I might have will be abandoning this blog in search of more productive pastures... PLUS, one of my New Year's Resolutions was to be better about keeping my blog current this year.

Not doing so good.

Don't feel good. Could someone please pass the chamomile tea?

Tuesday, February 7, 2012

And... My Food! (Part 4, last installment)

You can find the other Parts here: Excitotoxins, BPA and Money

I have never added brown sugar to my kid's hot cereal, and we eat a lot of hot cereal.

Ever since she was a wee little one, I have mushed banana into her cereal (potassium!), sprinkled cinnamon (great health benefits!), and drizzled blackstrap molasses (manganese and iron!). With all this, how could she not love it? And she does!

Now don't get me wrong, I grew up loving brown sugar on my oatmeal and my ten grain, but I haven't sprinkled it on in over four years. At first, when I switched to cinnamon and molasses I definitely missed the lovely brown sugar sweetness. But that soon faded, and more and more I appreciated the rich flavor of the molasses, and the knowledge that I was getting much more nutritional bang for my buck. And I loved knowing that my kid wasn't overloading on refined sugar.

What I don't understand is how I could have been so smart about this (yep, I'm going to pat my back a little), and so clueless about food additives? There I am at home, being so careful about what I'm adding to my family's food, and then I march into the grocery store and fill the cart with a bunch of junk.

And I've been a pretty careful label reader. Just not careful, and knowledgeable, enough.

So I'm changing that, but it isn't exactly simple. If you're looking for me in the grocery store, I'm the one vaguely wandering around with a confused expression on my face, retracing my steps around and around the produce and dairy section. I'm actually a bit concerned I might appear as though I'm under the influence of something... but I haven't been asked to leave yet. The problem is this:

I cook us a hot breakfast every morning (the exception being when we have fruit and yogurt), and I cook us dinner every night. What I hadn't quite clued into was how many recipes call for cans of this, or a jar of that, or bouillon, etc. All those recipes are no good to me now, until I rework them to account for extra prep time for cooking my own beans, making my own hummus, chopping tomatoes, seasoning my own rice, making my own broth, sauce, etc.

I'm not complaining. None of these things are very hard, but they are a game changer, and I'm feeling the distinct need for some time spent browsing recipe books in the library. In the meantime, I've spent way too long in the grocery store, but have managed to feed my family Sauteed Veggies & Chicken over Rice with homemade Peanut Sauce, Chicken soup with Rice and Quinoa (made with leftovers from first dinner), Mushroom & Barley Soup with Spinach, and Radish Soup (my daughter's creation, and surprisingly good! I'll get it posted eventually).

A lot of soup! There have got to be some other whole food recipes I can handle, free of BPA and potential excitotoxins... this week I'm going to find them.

Monday, February 6, 2012

Excitotoxins, BPA, Money and My Food (Part 3)

You can follow the links to Part One and Part Two. A brief summary:

Excitotoxins are really bad for your brain.

BPA is really bad for your entire body.

And yet, these things are in our food. All the extra junk and additives and dyes and hormones and blech that are filling our food are there for a reason. Why? Why are we consuming them, both via our pocketbook and our mouths? Answer:

$$MONEY$$

BPA alone is a $10 BILLION-a-year product. Never mind if they're selling the Grim Reaper, companies don't want to give up that kind of cash. The only way we can stop it is to stop buying it. For myself, I'm proud to say that I haven't used the can opener for a week! Now check this out:

"The U.S. Public Interest Research Group (U.S. PIRG) Wednesday released "Apples to Twinkies," a review of agricultural subsidies that shows that since 1995, approximately 16.9 BILLION dollars in taxpayer money have gone toward supplementing four of the country's most common food additives - corn syrup, high fructose corn syrup, corn starch and soy oils." Food Safety News, September 2011

Did you know your tax dollars were subsidizing Twinkies and prepackaged donuts?

In contrast, healthy foods like oranges and spinach receive no regular federal funding, with the exception of apples. For apples,  the government spent about .01 percent of its agricultural subsidy money between 1995 and 2010. 

If you run the numbers, and Food Safety News did, this means that if all the taxpayer money spent on agricultural products were distributed back to the consumers, you would get about $7 to spend on junk food, and about 11 cents to spend on an apple. Since organic apples are running well over a dollar each at our grocery store, this wouldn't get one very far...

This means junk food is subsidized at a rate of  nearly sixty four times that of... just apples. Not produce in general. Just apples. Apparently all we need is a tenth of an apple a year, and all those beet and radish and kale and chard and spinach farmers better pull themselves up by their bootstraps, 'cause giant agribusinesses need money for corn syrup.

Weird, huh?

I read those numbers, and then I read these interesting food bits:

1) "Currently there are approximately 3,794 different additives used in or on food, 3,640 of those are used purely for cosmetic purposes, 63 are used as preservatives and 91 as processing aids. It has been estimated that some 200,000 TONS of food additives are used annually, that 75% of the western diet consists of processed food and, that each person consumes an average of 8 to 10 pounds of food additives per year."   Committee on Mental Health, Mental Retardation and Developmental Disabilities 2007

(I also found this list of Food Additives. Long!) 

2) "U.S. Department of Agriculture data show that today we’re eating more of everything. By far the largest increase has been in the consumption of fats and oils, with a 63 percent jump over a 33-year period, from per capita annual consumption of about 53 pounds to about 86 pounds." Mother Earth News

3) "In 2000, the per capita consumption of high fructose corn syrup was 63.8 pounds." USDA Profiling Food Consumption in America

So, it isn't too tough to follow:

1) Our government gives huge subsidies to the manufacturers of "junk food ingredients."
2) This makes junk food cheap, cheaper than apples and much cheaper than vegetables.
3) Then, those junk foods are actually engineered to leave you wanting more and feeling unsatisfied.
4) We have a myriad of health epidemics linked to crappy food habits.

Remember Cuba Gooding Junior's "Show me the money" rant? (You know you want to watch it again). Well, we have to stop showing agribusiness the money. We need to do the work to get our tax dollars out of their hands, and we have to stop paying for their products at our stores. It is the only language they understand. It isn't enough that they contribute to the obesity, heart disease, and diabetes epidemics (to name a few). They will only stop if the money stops flowing.

Last thing! And maybe a little off subject... I have a friend who went to culinary school, and he gave me the heads-up on this one. There is something called Flak-Mor that is rolled into a lot of commercial pastry and bakery products. I have searched and searched for images but am not turning anything up... I wonder if the company manages to delete them all? According to my friend, who got to hold it and roll it and squeeze it, it feels and looks like grey modeling clay, but it rolls out really well, nice and smooth, and makes your baked goods really flaky! And yummy! And leaves you... wanting more!

I'll stick with butter please.


Sunday, February 5, 2012

36' Sailboat for Sale

Two years ago we sold Adios, our wonderful, kindly, proud 36' boat. This is her:


We sold her to a truly great guy, but with the economic conditions as they are, he hasn't been able to spend time with her, nor even travel to visit. And so she waits.

After idling on the dock for two years she isn't without problems, but she is a great liveaboard and cruiser. We lived aboard her with two big dogs, one small cat, a baby on into toddlerhood, and two adults. If you are single or a couple, you'll be styling! (Note: All signs of dog/cat are gone. Even got new cushions!)

In 2009 we sailed Adios from the San Juan Islands up the Inside Passage to Ketchikan, AK. She would have taken us much further, but we ran out of money and time, so she sailed us home again.

Adios is a 36’ Doug Peterson design (Peterson is a famous yacht/ocean racer designer and key member of design team for Black Magic, winner of 1995 America's Cup). She has a beautifully hand-laid fiberglass hull, a wooden mast and wheel. She has six bunks and could sleep seven, but more reasonably sleeps four (if you’re planning on carrying extra sails). We redesigned one salon bunk to pull out into a small double bunk. The V-berth sleeps two, there is a second salon bunk, and then two bunks aft below the cockpit. Adios also has solar power, a composting head with sink+cupboards, and a great little galley. The V-berth cushions are in good shape and the salon has new cushions and covers. (She has a new spice shelf above the sink, not in picture).

Galley with Propane Oven/Stove Top
Sink in Head
She is a strong, kindly boat, sails and handles well, and took care of us over many, many miles of sailing. Her main is new-ish and her headsails will take some more wear. She also has new anchor and chain, and a manual windlass. She has a Leyland diesel engine (nickname Lisl), and a Dickinson diesel heater.


Her biggest problems are due to sitting at the dock for two years. Her bottom paint still looks good, but is slimy. Her prop is sure to have some barnacles on it. A haul-out, pressure wash, new zincs, and coat of bottom paint would set her straight. While hauled out, she should have her aft shaft couple replaced. It isn't broken yet, but you would want a new one before you headed out. Also, the shaft linkage cable is broken-- an inexpensive part and an easy fix. Beyond that, she has a small laundry list of relatively simple projects that have arisen from neglect but won't stop you from going sailing.

Example: There are some soft spots in the decks that will require epoxy injection -- a nice summer project -- and her bright work isn't so bright anymore.

Here are some more pics (I am trying to find a salon shot. Will post if I can. I also have an engine shot somewhere):

Chart Table
V-berth. Note... we painted after this pic was taken, in colors for our daughter... quite lovely!
Port aft berth (we used for sail storage and dog bed)
Just a great cruising to AK galley shot
At anchor in George Inlet, AK
So! Asking $20,000. She is not ours (remember we already sold her), but we love her and will help her current owner find her a good home. Let me know if you are interested!! She needs to go sailing!

Friday, February 3, 2012

Excitotoxins, BPA, Money and My Food (Part 2)

If you missed Part 1, follow this link.

At the end of my last post, I promised to shrink your grocery store... Here goes. Check out this picture:


There are three significant things in the photo above, none of which are immediately apparent. The first is that these were the last three cans and boxed mix I had in my cupboards. The second is that I made a complete meal using just these four items plus spices (recipe to follow). The third is that--surprisingly enough--the Jiffy Mix, while not perfect, may just be the safest food in the bunch.

The other three canned items all likely contain BPA, something that was hot in the press several years ago as consumers demanded that it be removed from baby bottles and water bottles. But it is still in the linings of canned goods. I have known this for awhile, which may be true for you too, but I only recently learned just how damaging to our health BPA can be. So! I made our last canned meal from these items, and thought it somewhat odd that I was able to do so, as I certainly didn't plan ahead of time that these would be the last three. The recipe is quick, easy, and can contribute to cancer, obesity, heart disease, and immune dysfunction (to name just a few).

Here is what you do:

1) Gently warm the coconut milk and pumpkin in a cook-pot over low heat, stirring to mix well.
2) Drain and rinse the garbanzo beans, then puree them + 1/4 cup water in a Cuisinart, if you can.  Yes! We received a tiny Cuisinart for Christmas. Look how cute it is:


3) If you pureed the beans, then mix them into the coconut/pumpkin until smooth and warmed through. You may add more milk (coconut or cow's) to thin if desired. Season to taste with garlic powder, onion powder, salt and pepper. Then serve! The bonus here is that my kid ate the soup with the beans pureed. Last time I made it I put the beans in whole, and she wouldn't eat it.
4) If you cannot puree the beans, just stir them in whole and continue warming gently until heated through. Season as above in step three, then serve.

Note: I also made the jiffy biscuits to serve with this meal, but will detail the no oven "how to" in my next post.

There you have it! An easy recipe made with healthy foods that can wreck havoc with your health! Will you still make it? You could of course buy organic whole pumpkin and cook it then puree it, and buy organic garbanzo beans and cook them and puree them... but I'm not so sure what you can do about the coconut milk... let me know if you have ideas (I checked out the boxed coconut milk but it has... carageenan! Note: I am still struggling with the carageenan question. I am finding very conflicting information about it, and have yet to uncover what I think is a "solid source." Tips are appreciated.)

But all this begs the question: 

What's up with BPA? Why is it in my canned foods and Why is it so bad?

I read a great interview with Frederick vom Saal in Mother Earth News. Vom Saal is a BPA researcher at the University of Missouri's Endocrine Disruptor Group. The following is excerpted/restated from the interview, with my comments.

BPA is derived from petroleum. It is present in the epxoy resins used to line aluminum soda cans and the steel cans that contain your soups, beans and vegetables. BPA was approved by the EPA for use as a food contact material in 1963, but has been around in other products since 1910. Why is this bad? Citing research dating from the late 1990s to present, vom Saal believes BPA contributes to multiple health empidemics, including:

cancer
diabetes
heart disease
immune dysfunctions including allergies and asthma
early puberty
damage to every part of the reproductive system
uterine fibroids
ovarian cancer
breast cancer
low sperm counts
prostate cancer
abnormalities of the urethra
attention deficit hyperactivity disorder
learning disabilities
social behavior disruption
"It causes the brain of a young animal to look like a senile, aged adult, and it's a cause of impaired memory" (This sounds like the Curious Case of Benjamin Button, but without any hope for a little time of joy in a younger future)

Alright. That's a lot of big bad stuff. So tell me again why BPA is in our food containers? Well, it helps create great-looking, versatile products. Further, when it is in a chain-linked polymer form it isn't a problem. The problem occurs when the chains are exposed to high temperatures or a bit of an alkaline environment. Then, they break apart, and when the molecules break away they become a hormone.

So... I have never been inside a huge, industrial, canning establishment, but I know canning at home requires high temperatures. I'm assuming the same is true on an industrial scale. This means all those cans are exposed to heat, and then begin leaking BPA into your food.

The rationalization for using BPA was, "Even if it is an estrogen (a hormone), it's so weak you don't need to worry about it." But vom Saal and researchers used breast cancer cells to study estrogen chemicals for their potency, and BPA "lit up like a Christmas tree." Vom Saal states: "We said, 'Holy Makeral! What is it that would ever make anybody think this is weak?"

What the Research Shows... very interesting...

There are now more than 1,000 studies of BPA from both independent and industry-funded sources. ONE HUNDRED percent of INDUSTRY funded studies conclude that BPA is perfectly safe. Vom Saal reviewed the entire body of BPA literature seven years ago, and found that greater than NINETY percent of independent studies  reported BPA harms our endocrine system. Since then, the ratio of studies demonstrating harm to those "not showing harm" has increased dramatically.

Unfortunately for us, BPA is one of 62,000 chemicals grandfathered in through the Toxic Substances Control Act. This means there is no regulation of BPA, even though the FDA has stated that it agrees there is reason for concern that BPA causes prostate cancer, early puberty and other health problems. And because BPA is a grandfathered chemical, the FDA cannot ban it or regulate it. They cannot even require companies to disclose its use.

There is a great deal more of excellent information in the article, but my goal here is not to re-type it, just to alert you and make you curious enough to learn more. The entire article may be read at Mother Earth News.

One immediate concern I have (other than damage to every part of my reproductive system) is for simple boat provisioning... but I guess this is just one more strike against cans. Already they are:

1) Heavy
2) Consume much recycling space when empty, and now
3) Poisonous too.

Thoughts? Comments? Ideas for coconut milk?